

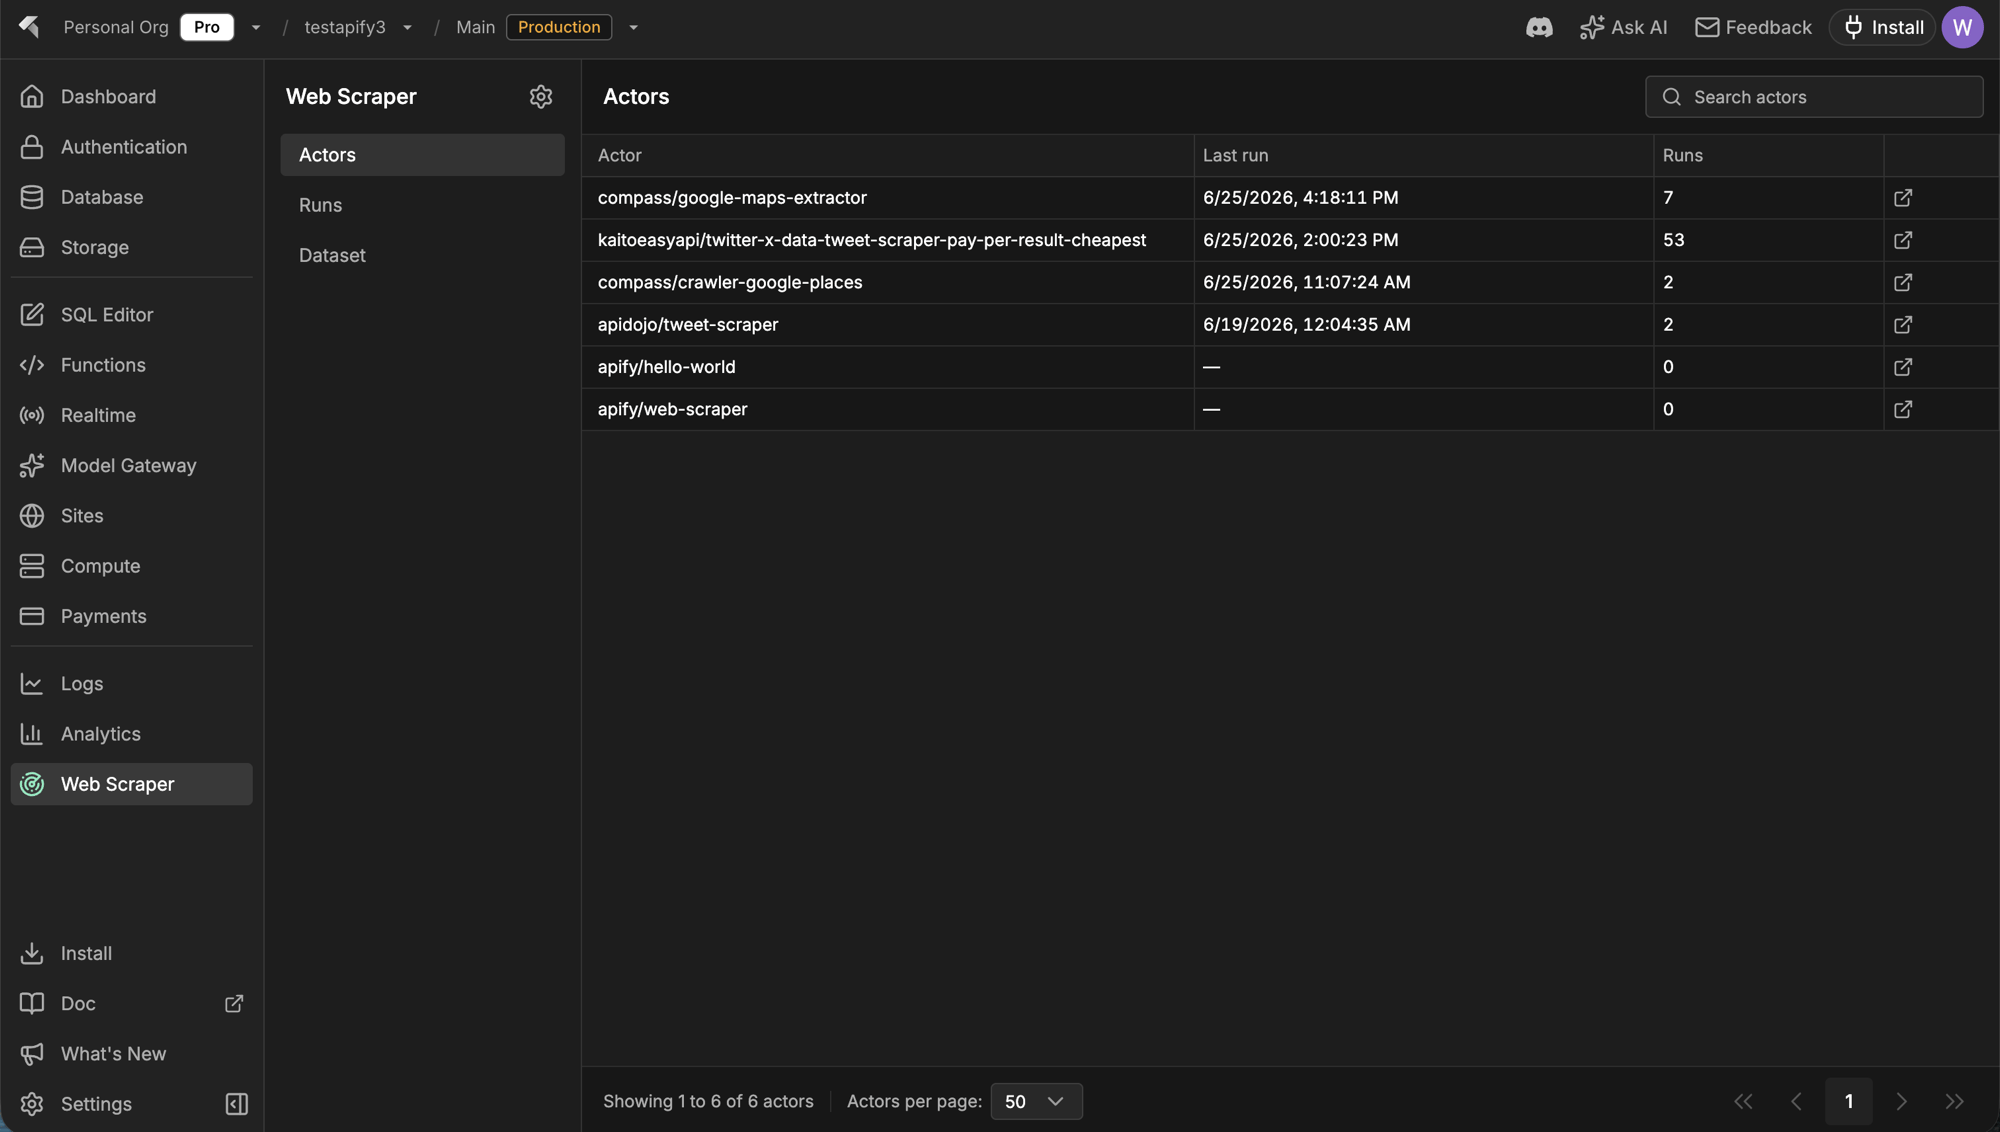
Web Scraper dashboard: connected actors with their last run and total run counts.
Apify remains the source of truth for actors, runs, and datasets. InsForge surfaces a focused subset for everyday checks, then deep-links into the Apify console for anything beyond it. The Web Scraper integration runs on InsForge Cloud and on self-hosted deployments alike; only the way you connect Apify differs.
Features
Apify connection
Connect Apify from the Web Scraper page in the dashboard. What happens next depends on where InsForge runs. On InsForge Cloud it is one click: InsForge walks you through the Apify OAuth flow, stores the credentials server-side, and keeps the access token refreshed for you. Self-hosted deployments have no OAuth broker in front of them, so you bring your own credential instead. Create an API token in the Apify console under Settings → Integrations, paste it into the Web Scraper page, and InsForge stores it encrypted in your own backend’s secret store.insforge webscraper apify connect --token <token> does the same from the CLI.
Either way the token stays out of your repo and your app bundle; agents and functions fetch a live one from the backend when they need it.
Scrape via your coding agent
After connecting, the empty state ships a scrape prompt you can paste into your coding agent:npx @insforge/cli webscraper apify login fetches your InsForge-managed Apify token, authenticates the local Apify CLI headlessly (no browser OAuth), and installs the Apify agent skills. From there the agent picks an actor from the Apify Store, starts runs, and reads the results back.
Actors
The actors you have used or created recently, with their last run time and total run count. Each row deep-links into the Apify console for full actor configuration.Runs
Recent scraper executions with status (succeeded, failed, running), start time, and cost in USD. Useful for a quick “did last night’s scrape work and what did it cost” check without opening Apify.Dataset
Datasets produced by your runs, with item counts, creation time, and the actor that produced them. Deep-links into Apify storage where you can inspect or export the items.Landing scraped data in your database
Scraped results live in Apify datasets by default; nothing is written to your project’s Postgres unless you want it there. For small scrapes, your agent can just return the results. For anything you want to keep or refresh on a schedule, have the agent deploy an edge function or compute service. Either one fetches the dataset from Apify and upserts rows into a table.Settings and disconnect
The Web Scraper Config dialog (the gear icon in the sidebar) shows the connected Apify account, plan, and data retention, links into the Apify console, and lets admins disconnect. Disconnecting only stops InsForge from using your Apify credentials — self-hosted, it deletes the stored API token from your secret store outright. Your Apify account, actors, and datasets stay intact, and you can reconnect anytime.Concepts
Apify actors
The serverless scrapers behind every run, from ready-made Store actors to your own.
Apify storage
How datasets store scraped items and how to export or fetch them via API.
Build with it
InsForge CLI
npx @insforge/cli webscraper apify connect links your project to Apify, then logs your local agent in.Apify Store
Thousands of ready-made actors for common targets, from Google Maps to social platforms.
Apify API client
Call actors and read datasets from your edge functions or compute services.
Next steps
- Open the Web Scraper page in the dashboard and click Connect Apify — or, self-hosted, paste your Apify API token there.
- Paste the scrape prompt into your coding agent and tell it what you want to scrape.
- When a scrape is worth keeping, ask your agent to land the dataset in a table via an edge function or a schedule.